

I found the “Hybrid Binoscope Project” to be splendidly successful.The image was more than perfect both in sharpness and in the clarity of the field.It has totally kicked off the possible negative estimation of the optical engineers quoting the negative effect of replacing the prisms for the mirrors.
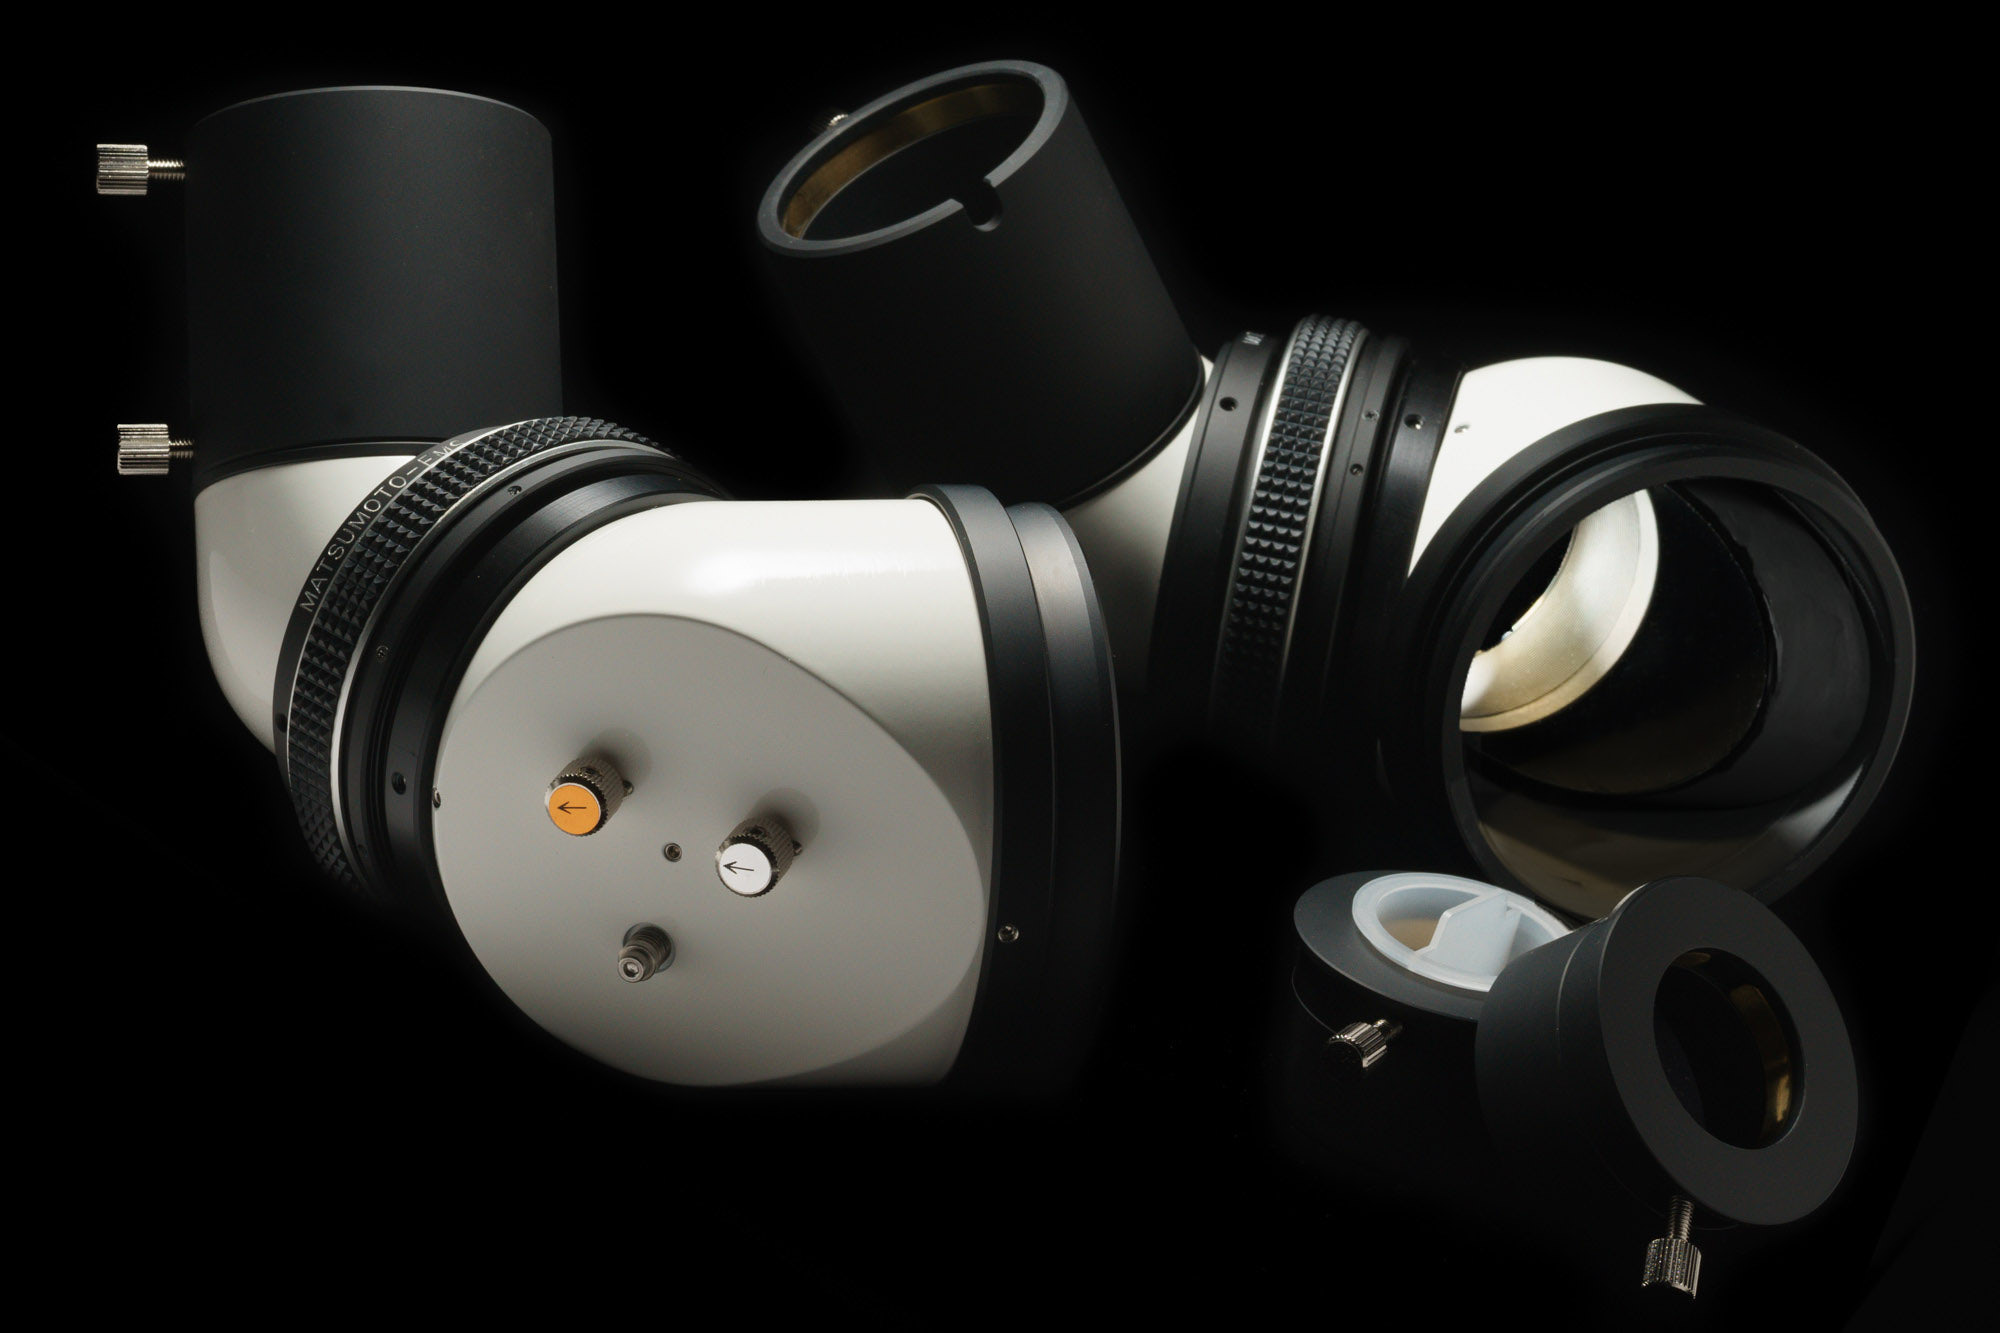
仮組み立をして実際に近所の風景を見てみました。 光軸は組み付け段階ですでにほぼ完璧に出ており、見え味も期待以上でした。計算家はとかく市販の双眼鏡のプリズム系をミラー系と交換することに批判的ですが、それは机上の計算上でのことであり、現実には計算外の多くの要素の集積の結果が勝負となりますので、そうした専門家の予想は当たらないことが多いのです。 今回は、期待以上の好結果で、私も驚いています。 視野周辺までのピンポイント結像という観点では、必ずしもEWV32との相性はベストではないかも分かりませんが、視界の透明感や、水銀灯のピラーと電線の間に張られた蜘蛛の巣のリアルでシャープなのには、久しぶりに身震いしました。 純正の状態を見たことはありませんが、多分、初期の設計に反したプリズム交換による得失の収支はプラスに働いたものと予想します。
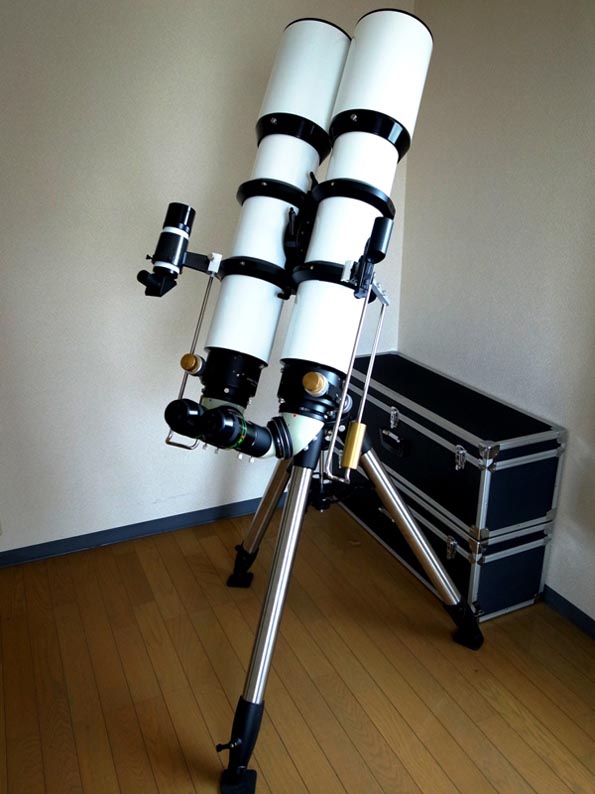
LX200架台とのマッチングですが、フォークの長さが少し足りません。 手前の合焦機構部を重くしトップヘビーを最大限キャンセルしましたし、、これから長めの2インチスリーブを製作することを前提としても、理想バランス状態ですと、高度角75度が上限です。 敢えて少しバランスを崩してBINO本体をアリガタ1のリミット一杯に前に出すと、高度角85度までは向けられます。(左の写真)完璧に完全バランス状態で天頂オーバーまで向くことにこだわりますと、非現実的に重いウェイトを手前に追加するか、フォークアームを切断中継ぎ等の大手術が必要になります。
ただ、この天頂の問題は、上記のBINO本体の基本性能上の成功に比べれば、些細なことです。 枝葉末節にこだわってシンプルさを失うよりも、優先度の低い案件を潔く切り捨てることも、素材をうまく活かしたスマートな結果を得るためには重要なことです。(LX200はコントロールプログラムで自動導入時の仰角制限が設けられるはずです。強制駆動はオーバー可能。)
しかし、このBINOの基礎重量は数値以上に半端ではありません。(数値を挙げるのは無意味です。ダンベルではありませんから。光学機器はデリケートで持ちにくいという現実を直視しないといけません。) 架台(CRADLE)へのセットには、BINO本体のアリガタとCRADLEのアリミゾがちゃんと自分に見えていることが必須です。 アリミゾクランプの位置と構造上、機構部を見ずに上から勘で置いてからクランプを締めて行く方法は今回の架台では出来ません。(説明が長くなりますが、よりシンプルな構造でより強力なクランプ機構を実現するためのトレードオフでした。) 20㎏をはるかに越えるBINO本体を顔の高さくらいまでほぼ片腕で挙上し、BINO本体の腹のアリガタをCRADLEのアリミゾに差し込まないといけません。
私は、最近筋トレをして来たことと、作業に慣れたので大分楽になりましたが、同じことがユーザーの方に出来るのかどうか、正直、不安です。 このプロジェクトを計画された時点で、ユーザー様は相当の力自慢か、あるいは計画発案当初よりトレーニングを積んで来られたものと確信しています。
しかし、今回のような挑戦を広く一般に推奨するわけではございませんので、ご理解くださいますよう、お願いします。 こうした特殊なご要望に対応することが、一般的なEMS-BINOの納期にどうしても影響してしまうからです。 こうした対応は今回で最初の最後とさせていただきます。しかし、今回のプロジェクトは、画期的なセンターフォーカス機構の実現等、私も良い勉強になりましたし、今後の一般的なEMS-BINOの進化にも大いに貢献してくれました。


