The core part of the New Center Focusing deviceセンターフォーカス用のパーツ入荷

The sliding screw set has just arrived. I confirmed it to be very reriable for the core part of the new center-focusing system.

待ちに待った、センターフォーカス用の要のパーツが着荷しました。 使用目的に十分な精度と滑らかさを確認しましたので、いよいよ、今回のTOA150-BINOの最後の山場であるセンターフォーカス機構の最終的な設計に取り掛かれます。BINOの完成も目前です。

SWAROVSKI-ATX95 with EMS preliminarily assembled / SWAROVSKI-ATX95、EMS仕様、仮組み立て

It is a great accomplishment of this test that a Binoscope using a pair of SWAROVSKI-ATX95 is proved to be definitely possible.But the back-focus available is rather short and we should trade off some conditions.At first, 31.7mm(1-1/4inch) adapter sould be made low profiled, and the dust filter should be eliminated so that the end of the eye-piece barrel will not hit the filter.Still doing this the focus margin is so small of a few milimeters, that some of the eye-pieces might not make focuses especially when the user has a strong myopia.So the “A” in the left photo should also be cut short by 6mm or so. But if A is cut short by 6mm, this EMS will have direct connection only with Swarovski.

EMS-USを新たに作るのももどかしく、20年前に10㎝F5-BINO用に作っていたEMS-M(実際は基準より大きなミラー)を急遽接続してみました。挿入バレルは挿入長12㎜の短いタイプ(接眼側のフランジと同じ物)に交換しています。 昨日、手持ちで確認した時の余裕の感触から、まずは、最初から極端な光路長の短縮を目指すのではなく、EMSの2インチ差込仕様を残して、交互に天体望遠鏡にも普通に使えるようにしてみました。 31.7アダプターだけは10mmほどLOW-PROFILEにしています。

その結果ですが、標準ピント位置のPL25㎜で正視状態(完全矯正眼)での無限遠の余裕がわずか2㎜程度でした。 もっともこのEMS-Mは、標準よりもスペーサーを2㎜足しているので、余裕は4㎜ということになります。 多くのアイピースに対応することを考えると、やはりEMSはSWAROVSKI専用にすべきのようです。2インチ差込にこだわらずに、SWAROVSKI専用にする場合は、左の写真のAをさらに7㎜ほど短縮できます。 さらにEMSのハウジングを加工することも奥の手としてありますが、これは少々面倒なので、なるべくやりたくありません。^^;(Bを短縮すると、防塵フィルターを撤去する必要があります。)

ともかく、SWAROVSKI-ATX95でEMS-BINOが構成できることが検証できたのが、今回の実験の大きな成果でした。 ブラケットが360度回転(しかも軸精度が良さそう)すること も分かり、中折れ式に近い目幅調整も可能のようです。 この超軽量な対物ユニットには対物レンズの他に、インナーフォーカス機構と鏡筒回転装置が含まれて いるのですから驚きです。

(TOA150-BINOの方も決して休んでいるわけではございません。 センターフォーカス用の機械部品の入荷を待っているのですが、連休に入ってしまいましたので、入荷は休み明けになりそうです。 うまく行けば、今後のEMS-BINOの主要な合焦手段となると確信しています。)

EMS-US Specialized for SWAROVSKI-ATX95 Coming very Soon! / SWAROVSKI-ATX95用EMS-US 緊急製作中!

I have just checked enough back-focus of SWAROVSKI-ATX95 now, and making an EMS-US specialized for it.

もともと、工業製品としての熟成度という意味では、天体望遠鏡に優るスポッティングスコープですが、SWAROVSKI-ATX95という、とてつもないスコープが登場しました。

超軽量な対物合焦ユニット部がモデュール化して着脱式となり、しかも、EMS(-US) 装着に十分なバックフォーカスを確保していることが判明しました。これは、(自然)観察手段のちょっとした革命を予感せざるを得ません。至急、EMS-USを1個仕上げて取り付けてみることにします。

Test loading with a pair of TOA150TOA150鏡筒仮搭載!

Now, it is the moment that I had a confidence in loading the LX80 Mount with the TOA150-BINO.There seems to be no sign of suffer of the Mount with the heavy loading.

鏡筒(TOA150)を載せてみました。 過搭載の影響を随分と心配しましたが、楽勝で載った感じです。設計の意図は全て的中し、クランプフリーでフルストロークの完全バランスを達成し、指1本で氷の上を滑るように動かせます。一番懸念していた鏡筒の極端なトップヘビーは、斜めウェイト軸の考えが功を奏し、見事にキャンセルしてくれました。電源を入れずにフリーで使うことも出来そうです。 このプロジェクトの成功を確信した瞬間です。

当初、重い純正の対物フードは撤去して樹脂製の超軽量な物を作る予定でしたが、重さを逆手に取り、鏡筒前後のバランス調整に利用することにしました。 フォーカサーは純正の物を使用しないのは、最初の予定通りです。 これより、センターフォーカスシステムに着手します。

Solution for the bug of AudioStar(LX80) on SkySafari3-Pro/Plus !!速報!LX80のSkySafari上でのカーソルの移動方向のバグの回避方法が分かりました!!


It may sound that this title is not related to binoscope making, but it is.It is very important for the TOA150-BINO in the making, which is to be loaded on the LX80 and will be linked to SkySafari via SkyFi.The trouble I had found is the wrong directions of the movement of the target cursor in the screen of iPhone/iPad on SkySafari.My friend who is an excellent digital engineer has just discoverd a wise way to evade the annoying bug of the AudioStar controller.He has uploaded a video in Youtube, but I am sorry that he spoke in Japanese only. I is rather difficult to instruct it even in Japanese, but I will do my best in English now, to share this precious accumplishment with my dear astronomy friends in all over the world.

1. Never use the fastest rate “9”. 2. Set the speed to the moderate level as shown in the video on the screen of Skysafari. It coincides with rate”6″ in the AudioStar controller. 3. Then tap the four direction buttons in the screen of SkySafari in turns. You will find odd directions in the lateral ones. But never go panic now. 4. Then, take the AudioStar controller and set the speed rate as “6”, and push every direction keys in turns. 5. Now, return to the SkySafari again, and tap the direction buttons on the screeen again. You will find the right directions of the cursor now!! After doing this process, you can choose the speed level from 1 to 8 (except for 9) at the AudioStar, and you will find no bug even in SkySafari.

LX80のコントローラー(AudioStar)について、SkySafari上のカーソルの移動方向にバグがあったのですが、この度、またTさんがこのバグの 回避方法を解明してくださいました。 これは私たち天文マニア、とりわけLX80でSkySafariを使用している(計画している)者にとりまして、この上ない 朗報であります。Tさんの快挙は、大いに喝采に値するものです。 日本の方には、私が下手にご説明するよりも、Tさんがさっそく動画を作成してくださっていますので、 それをご覧いただきましょう。

Weight shaft holdersウェイト軸ホルダー(TOA150-BINO)

It is not first to make such a stuff, but it is the biggest one I have ever made.

こうしたパーツは何度も作りましたが、これほど巨大なのは初めてです。 大きさの比以上に手間がかかりました。 しかし、30mmφのステンレスのウェイト軸は、何とも頼もしいです。

The Frame being trimmed for reducing the weightフレームの肉抜き(軽量化)TOA150-BINO)

The original weight of the frame is 9.2kg, and I could successfully reduce it to 5.8kg by trimming.

フレームの重量は最初の状態(ノートリミング)で9.2kgと、ほぼ絶望的な重さでした。 まず、リングに穴を多数開けて軽量化を図ったものの、苦労の割には8.0kgと、わずか1.2kgの減量でした。 サイドプレートをトリミングしたことで、何とかフレームの総重量を5.8kgまで減量しました。

鏡筒2本とウェイトシステムを含めた総重量は、公表がはばかられるほどになりますが、最善を尽くすしかありません。 未知の領域への挑戦です。(重心が常に三脚の中心にある、という強みがあるので、過搭載でも何とか使えるだろうという希望的観測です。)

Preliminery assebmly of the frame of TOA150-BINO on LX80(フレームを仮組み立てしました。(TOA150-BINO))

Counter weight systems will be set at the near bottom corners of side plates.The weight shaft will be stretched on a skew of 45-deg. toward the user.

フレームの概観はこんな感じになります。 ウェイト軸ホルダーは、左右のサイドプレートの下手前角にそれぞれ取り付き、左右一対のウェイト軸が観察者側、45度斜め手前下に500mmほど伸びます。 LX80に過搭載は承知ですが、この方法が一番実現性が高いと考えます。(ドーム内の固定ピラーに据付のため、今回は鏡筒の頻繁な着脱は考慮していません。)

EMS-UXL with large Helicoid Set for the TOA150-BINO completed(TOA150-BINO用のEMS-UXLセット(大型ヘリコイド仕様)完成!)

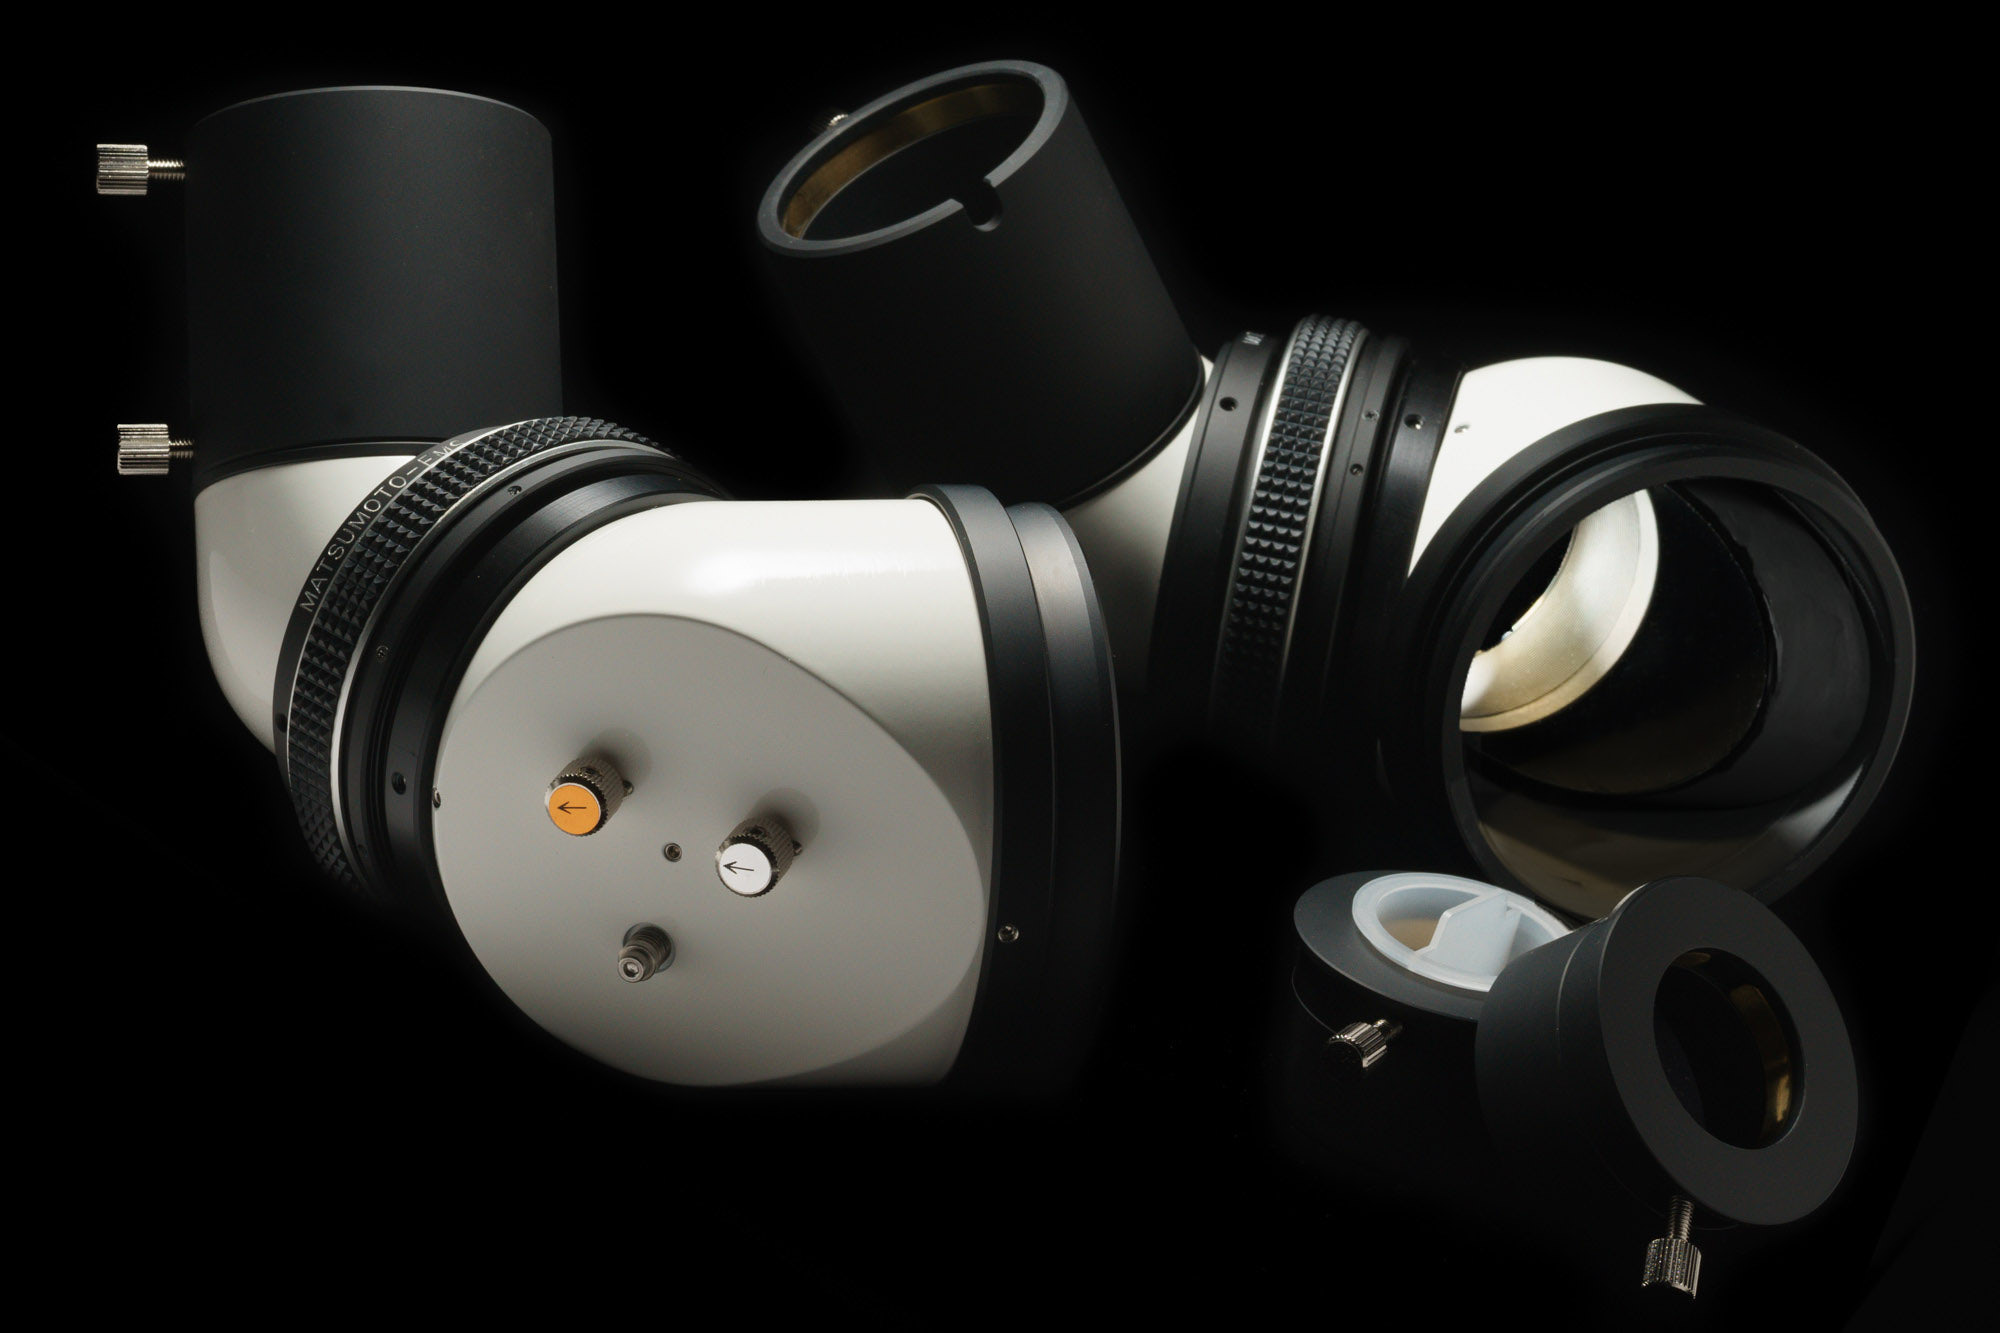
EMS-UXL with large Helicoid Set for the TOA150-BINO is completed.In the case of EMS-UL, the first mirror is identical in size with the second (eye side) mirror. While, in the case of EMS-UXL, the first mirror is far larger than the second.You can compare the seizes of the mirrors in the left photo. The novice would not tell the difference of the first mirrors in just watching stars through them, but actually the larger the better is the first mirror.

TOA150-BINO用のEMS-UXLセット(大型ヘリコイド仕様)が完成しました。 EMS-ULですと、第1ミラー(望遠鏡側)と第2ミラー(眼側)のサイズが同じですが、-UXLになるといかに第1ミラーが大きくなるかが、左の写真からお分かりになると思います。

直接に低倍時の視野のケラレにつながる第2ミラーのサイズ不足はすぐに分かりますが、第1ミラーのサイズ不足の影響は、BINO(というか光学系)初心者の方はなかなか気付かないと思います。 しかし、第1ミラーのサイズ確保は、口径をフルに利用するためと、低倍時の視野の周辺光量の確保のためには極めて重要です。大きくても大き過ぎることはないと言えます。 EMSの大型ハウジングは短径63㎜の斜鏡(標準のEMS-UXLの仕様)までは全く無切削で収納できます。

延長筒は、当初は大型ヘリコイドと第2ミラーユニットとの間に小径の物を挿入していましたが、最近は剛性重視の考えから、第1ミラーとヘリコイドの間に大径の物を挿入しています。 その方がヘリコイドにかかるモーメント荷重が小さくなるからです。ヘリコイド自体も開発以来日々改善していることも、申し上げるまでもありません。